
The Camp Crafter spent almost every summer of her childhood at summer camp, where she loved the songs, campfires, and especially the crafts. Now an art teacher during the school year and a camp counselor during the summer, she’s guiding readers to a cool camp craft they can do at home each week this summer.
Camp is a great place to make new friends! A way to symbolize the new friendships is with bracelets. Sometimes friends make two bracelets just alike to symbolize their friendship. And sometimes they pick different colored beads to represent different friends. Even if you’re not at camp, the summer is a time for friendship. Maybe you’ll meet a friend at the pool or at a park. This is a great craft to share with them!
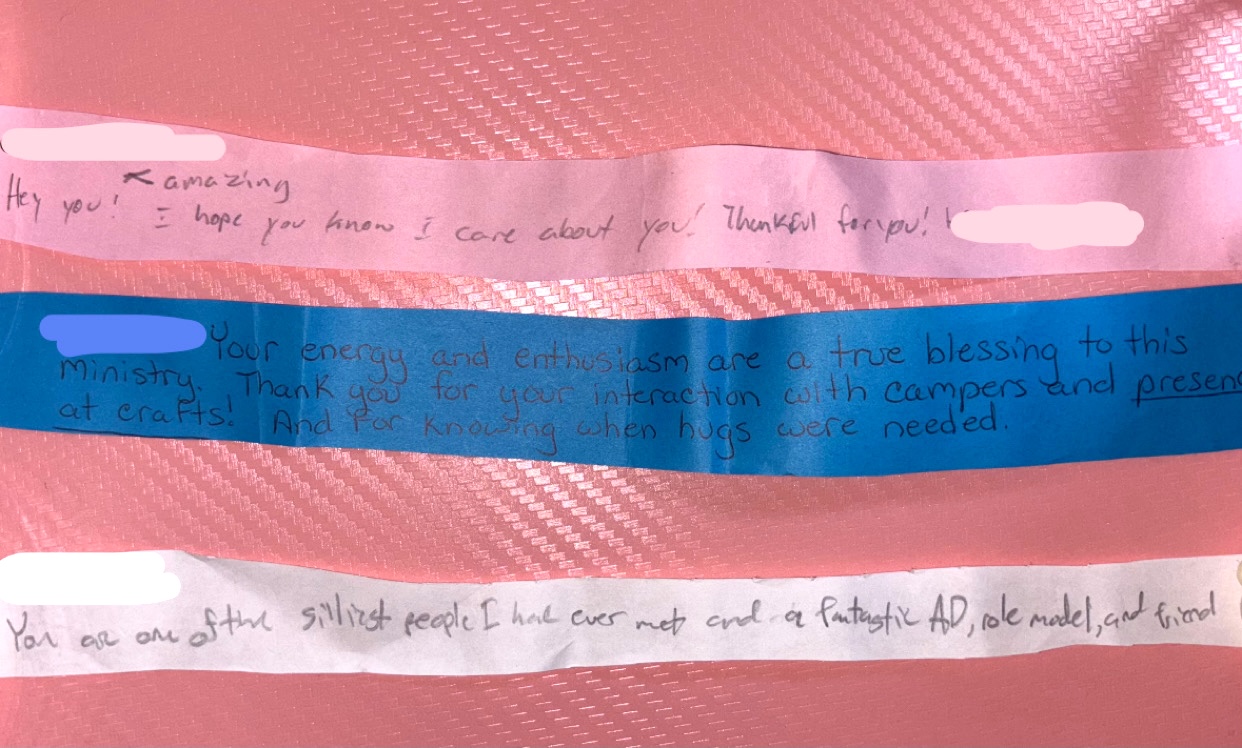
A fun activity at camp is “heart slips”. Every summer, we write affirmations to our friends. You can say things about how you appreciate their kindness or how cool their style is. Along with a bracelet, share with your friend something positive about them that you have noticed. Or hide some sweet messages around your house for the people you live with. Here are some I have received:
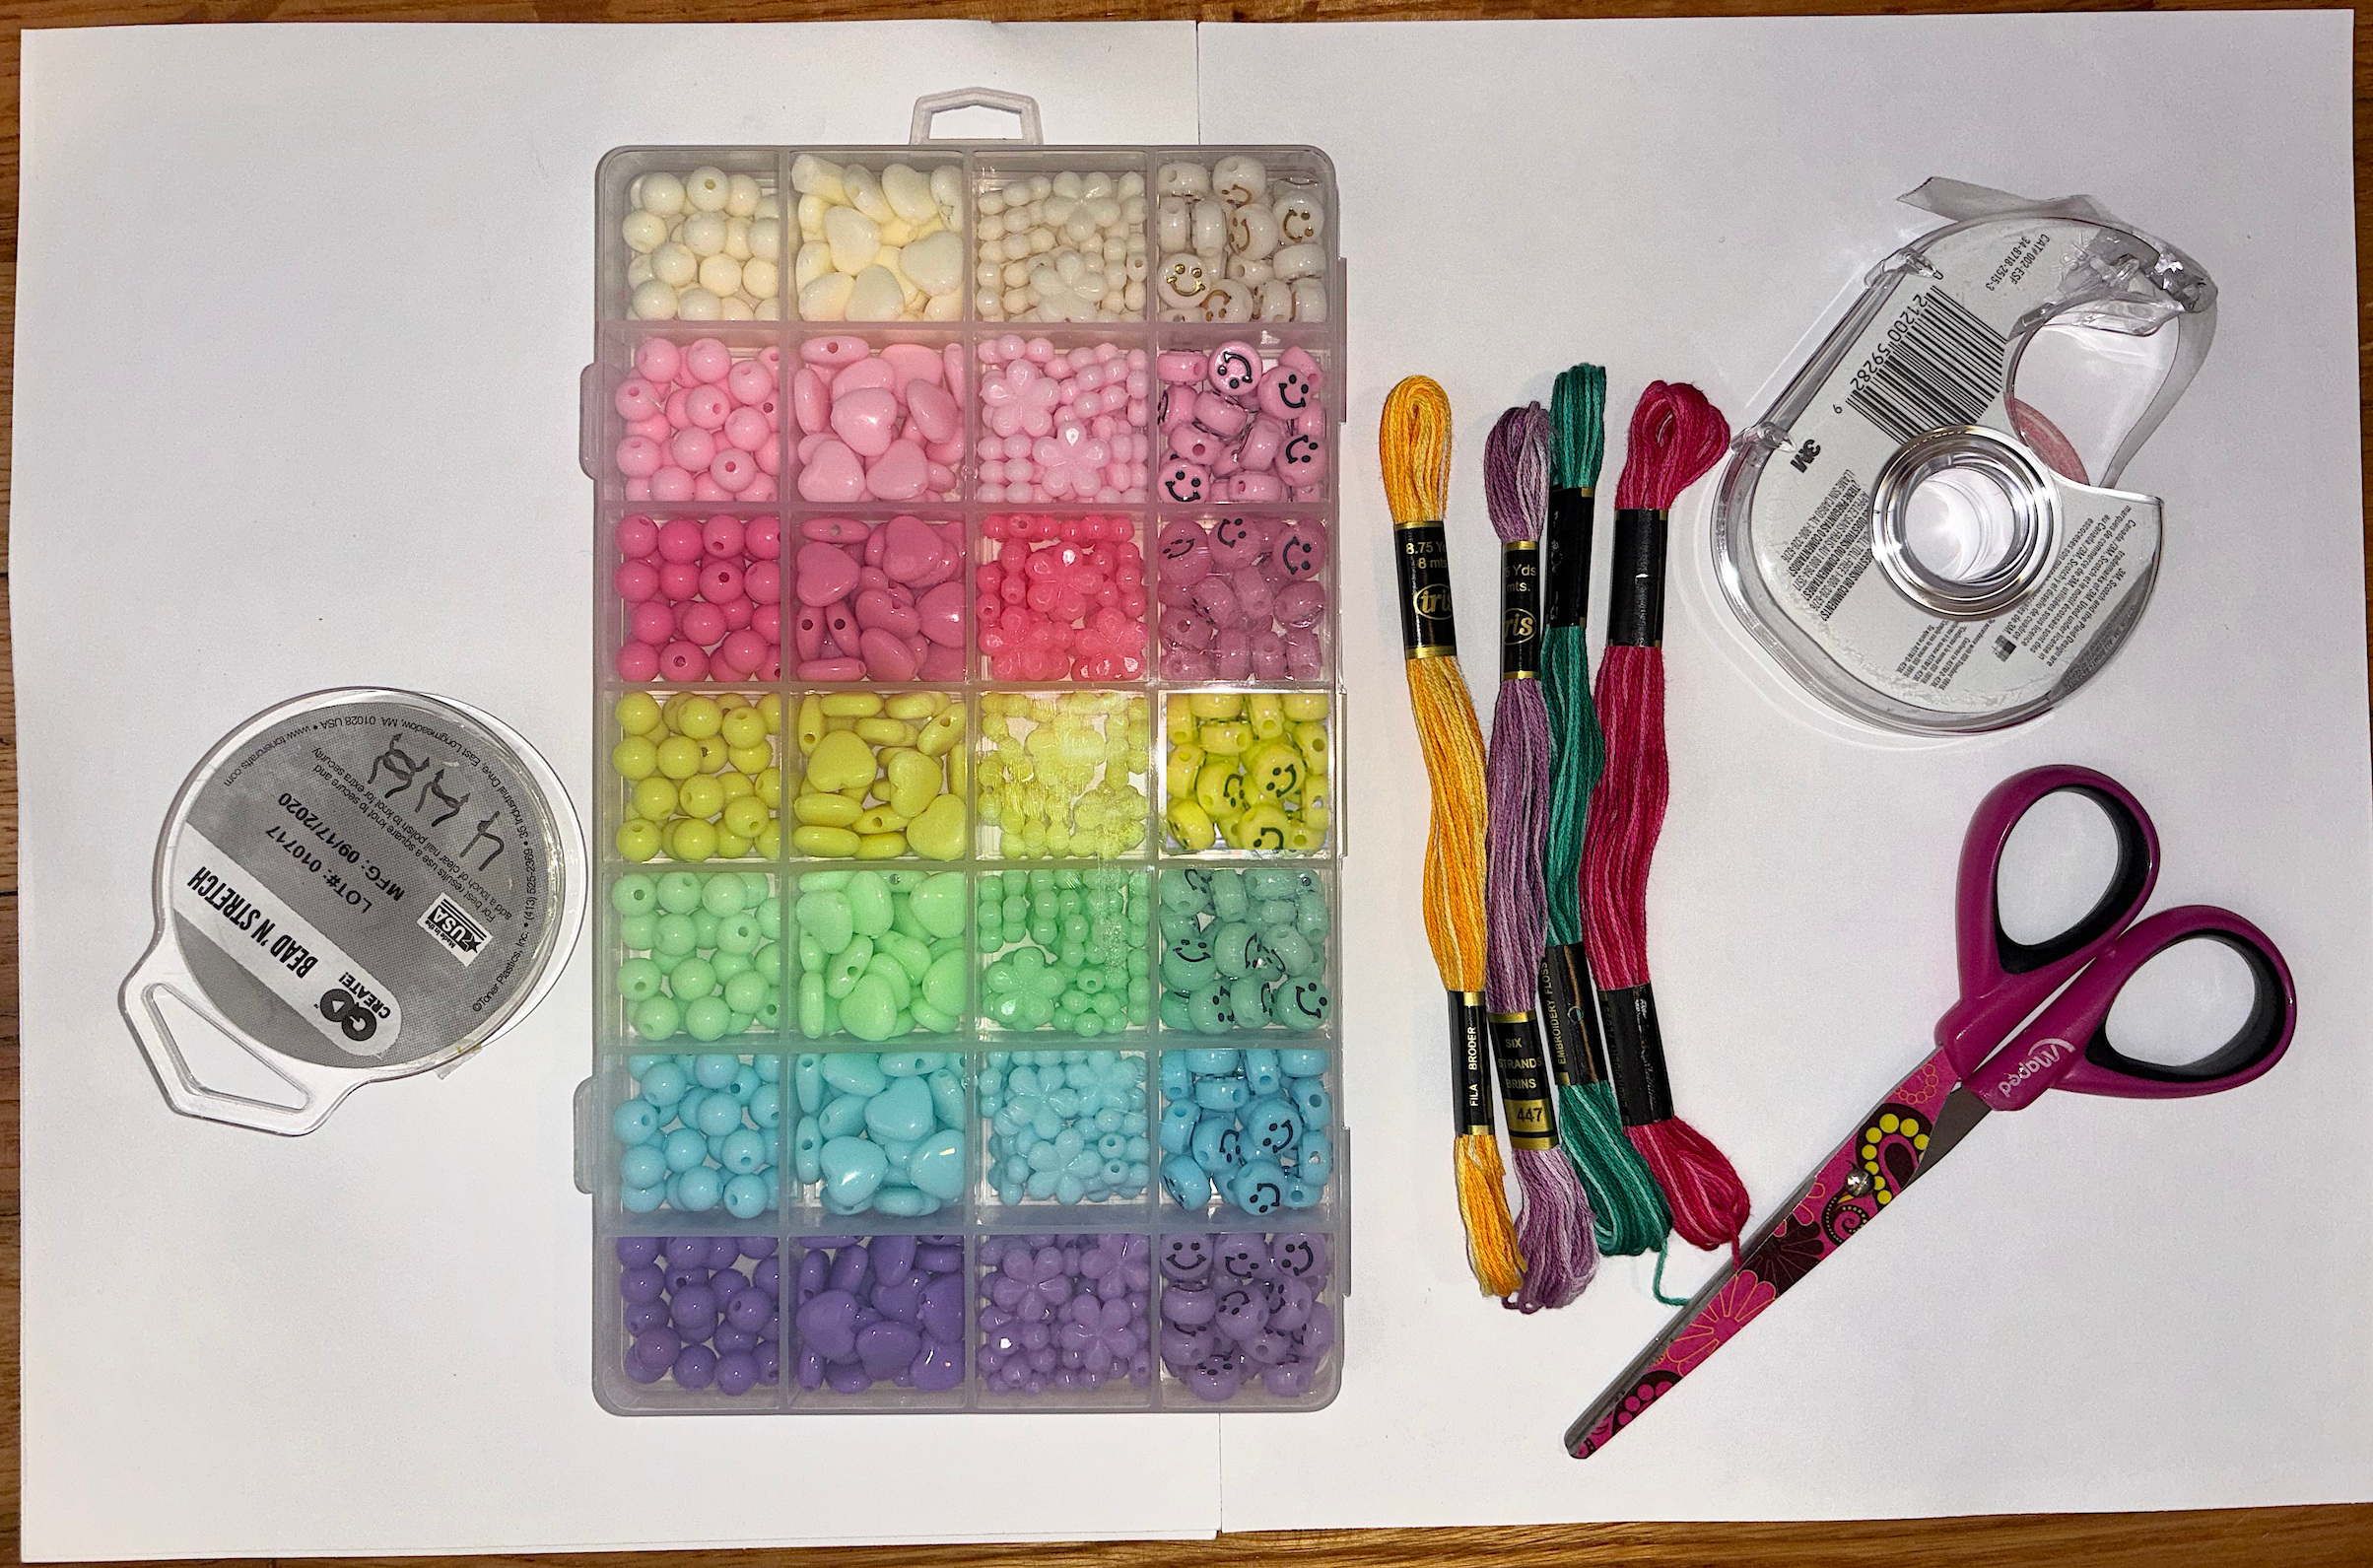
Supplies needed
scissors
tape
Option A
elastic string
beads
superglue (optional)
Option B
embroidery floss
Steps
Elastic String with Beads
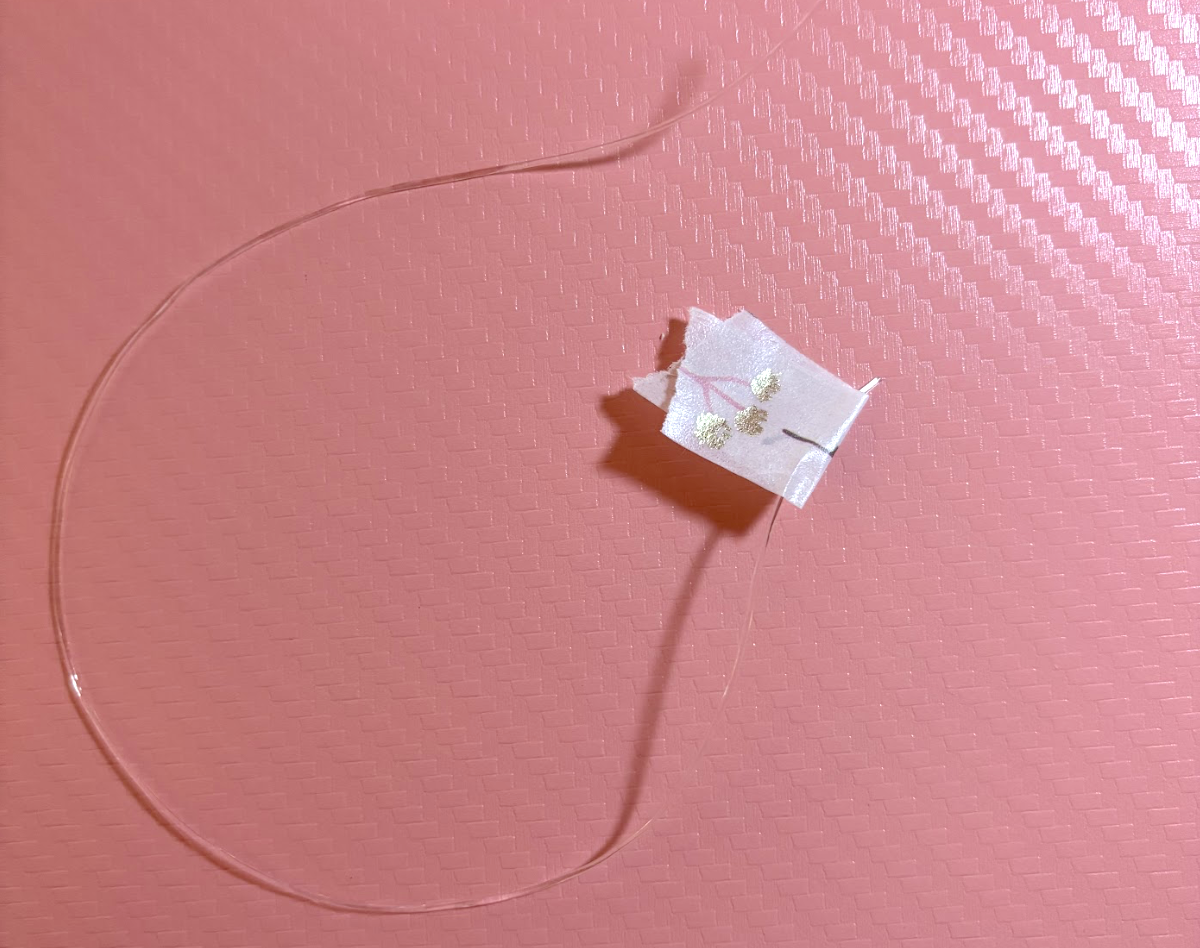
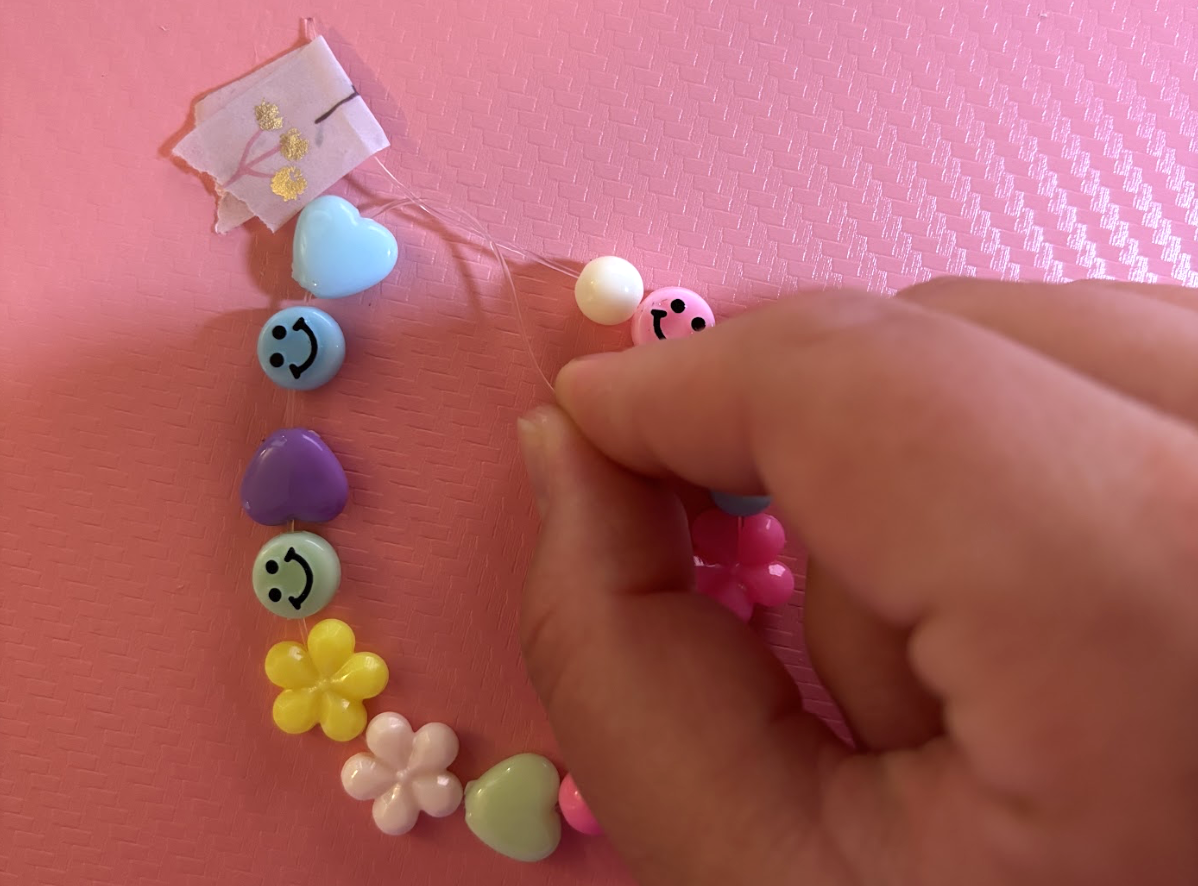
- Wrap your chosen material around your wrist to get a measurement. Pinch the string where you plan to cut. Add about 3 more inches. Cut the string.
- Fold the tape over on the string. This will prevent the beads from sliding off the string as you work.
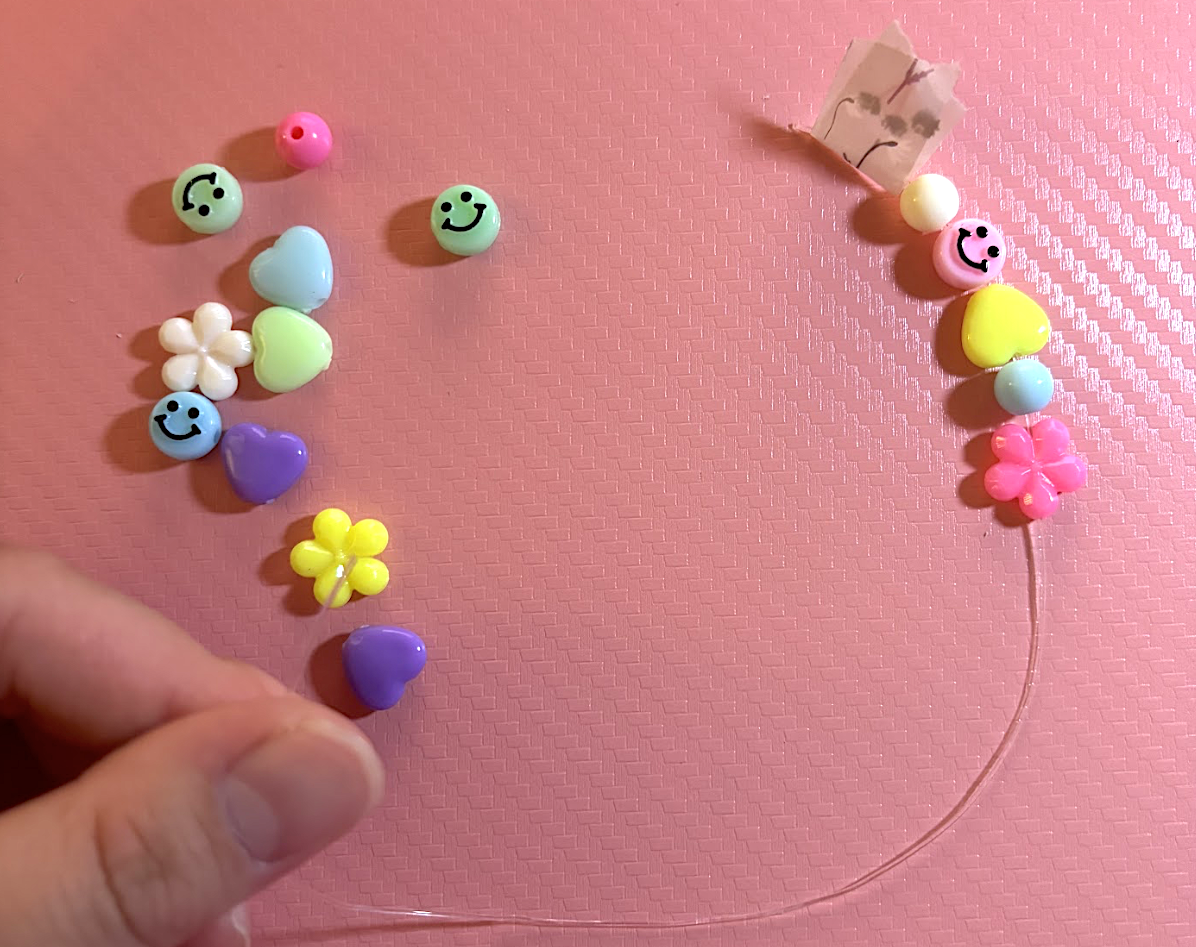
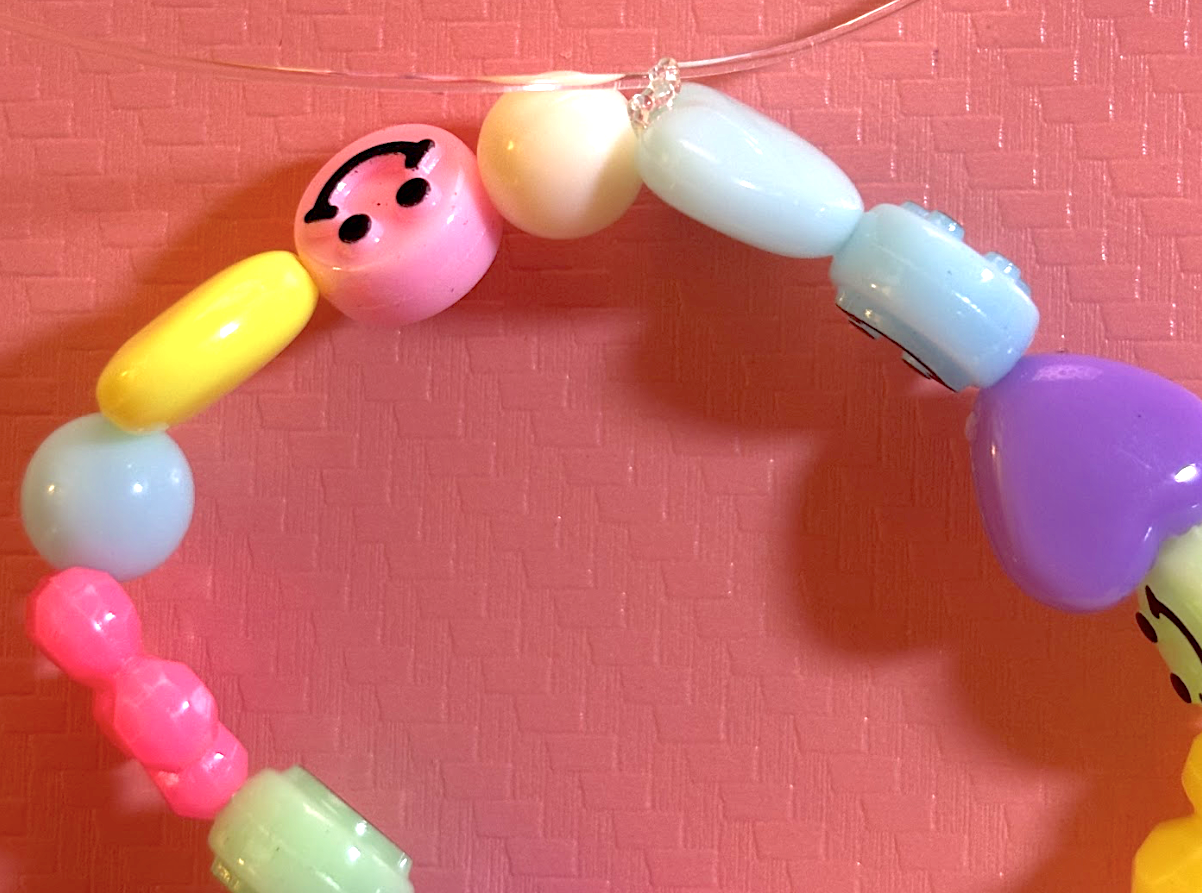
- Place beads on the open end of the string, however you would like.
- When you have about 3 inches of the string left, tie the bracelet together. Leave the tape on the string as you tie. Tie the bracelet with 4-5 knots.
- Add a dot of super glue on the knot to keep the bracelet from untying. This step is not required, but will ensure the longevity of the bracelet. An adult should help with this step.
Embroidery Floss
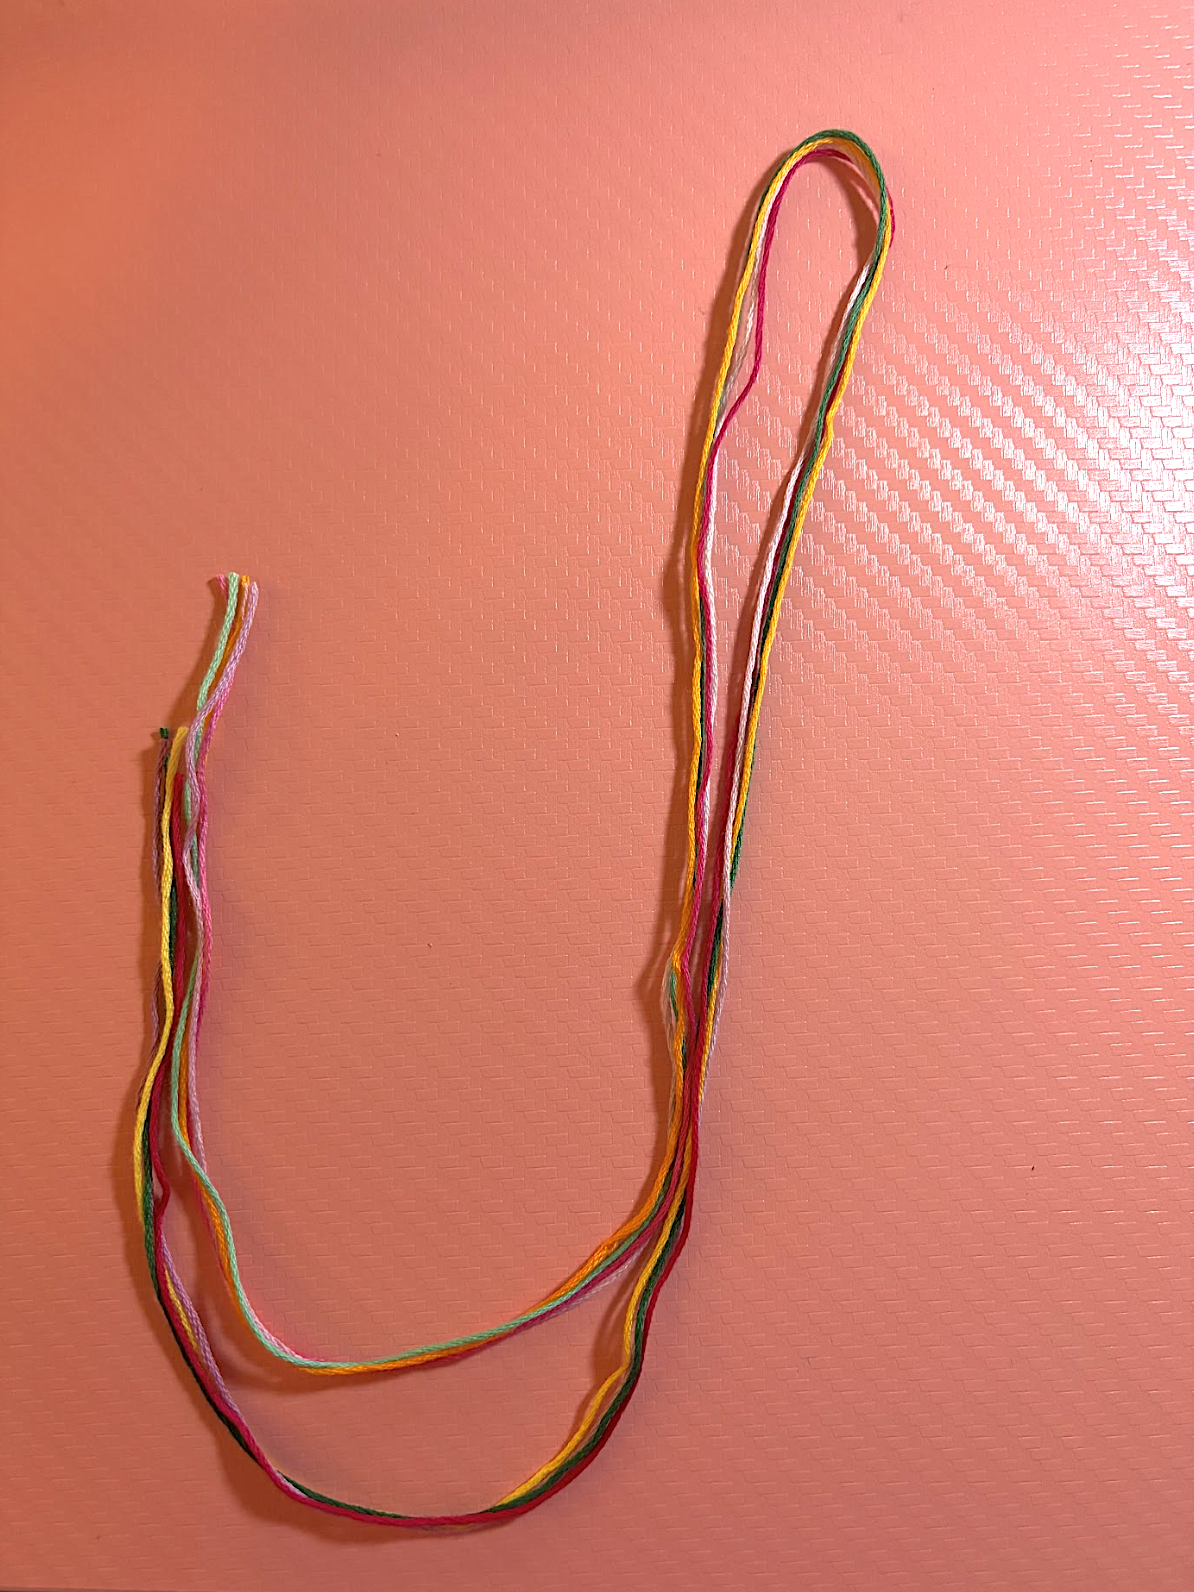
- Pick the four colors you would like to use for your bracelet. Cut each strand about 5 feet long.
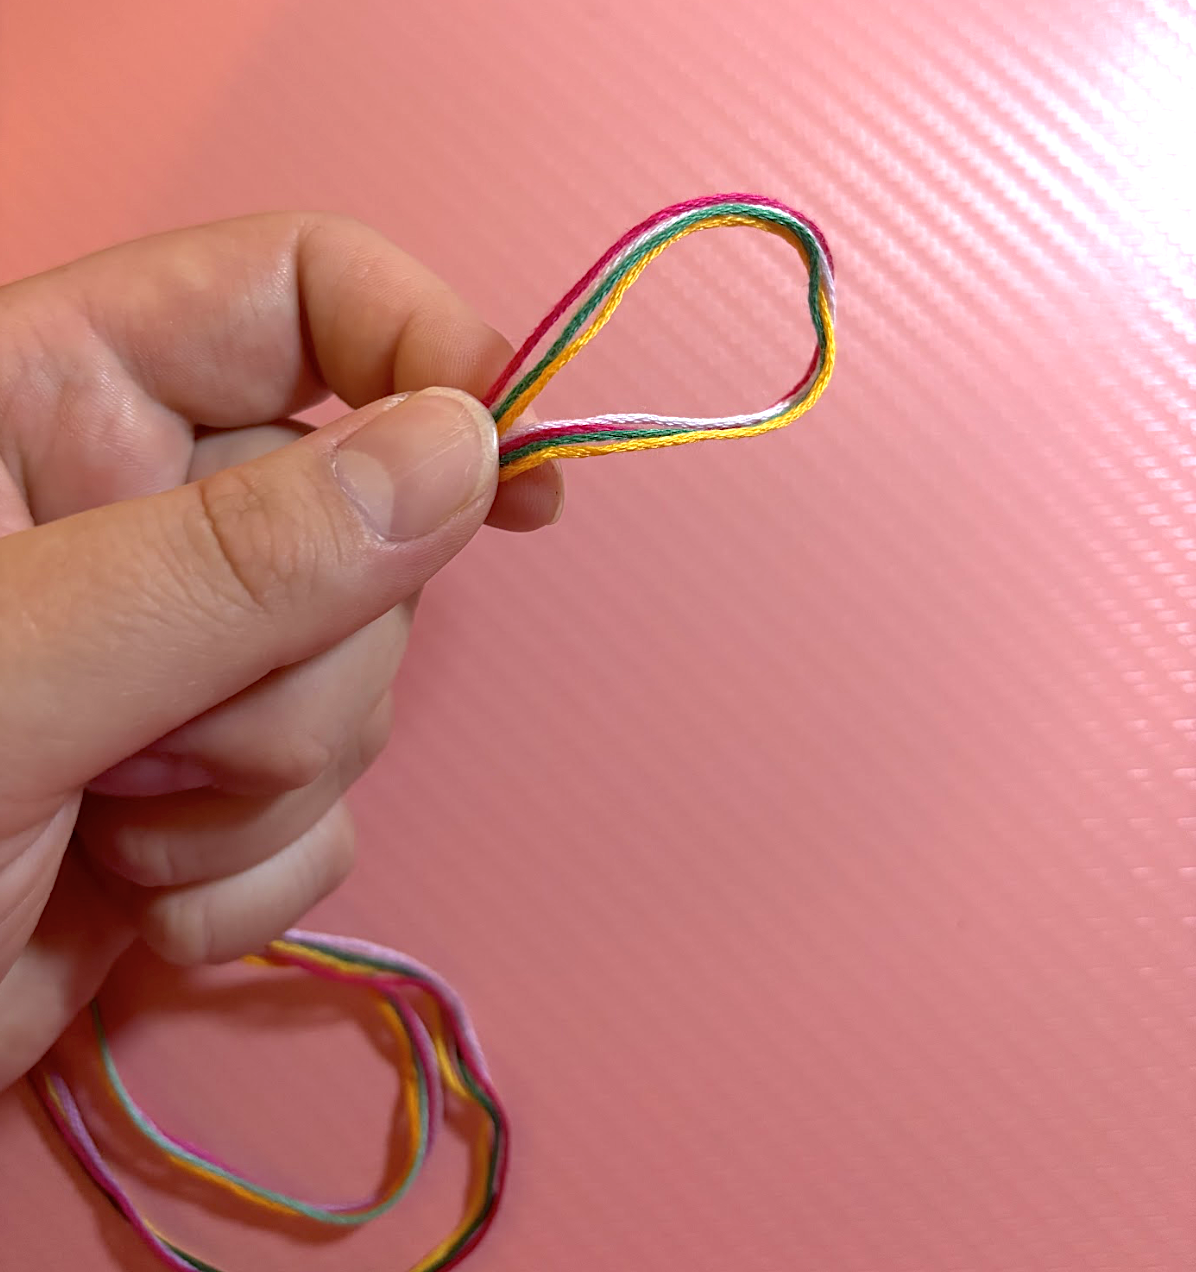
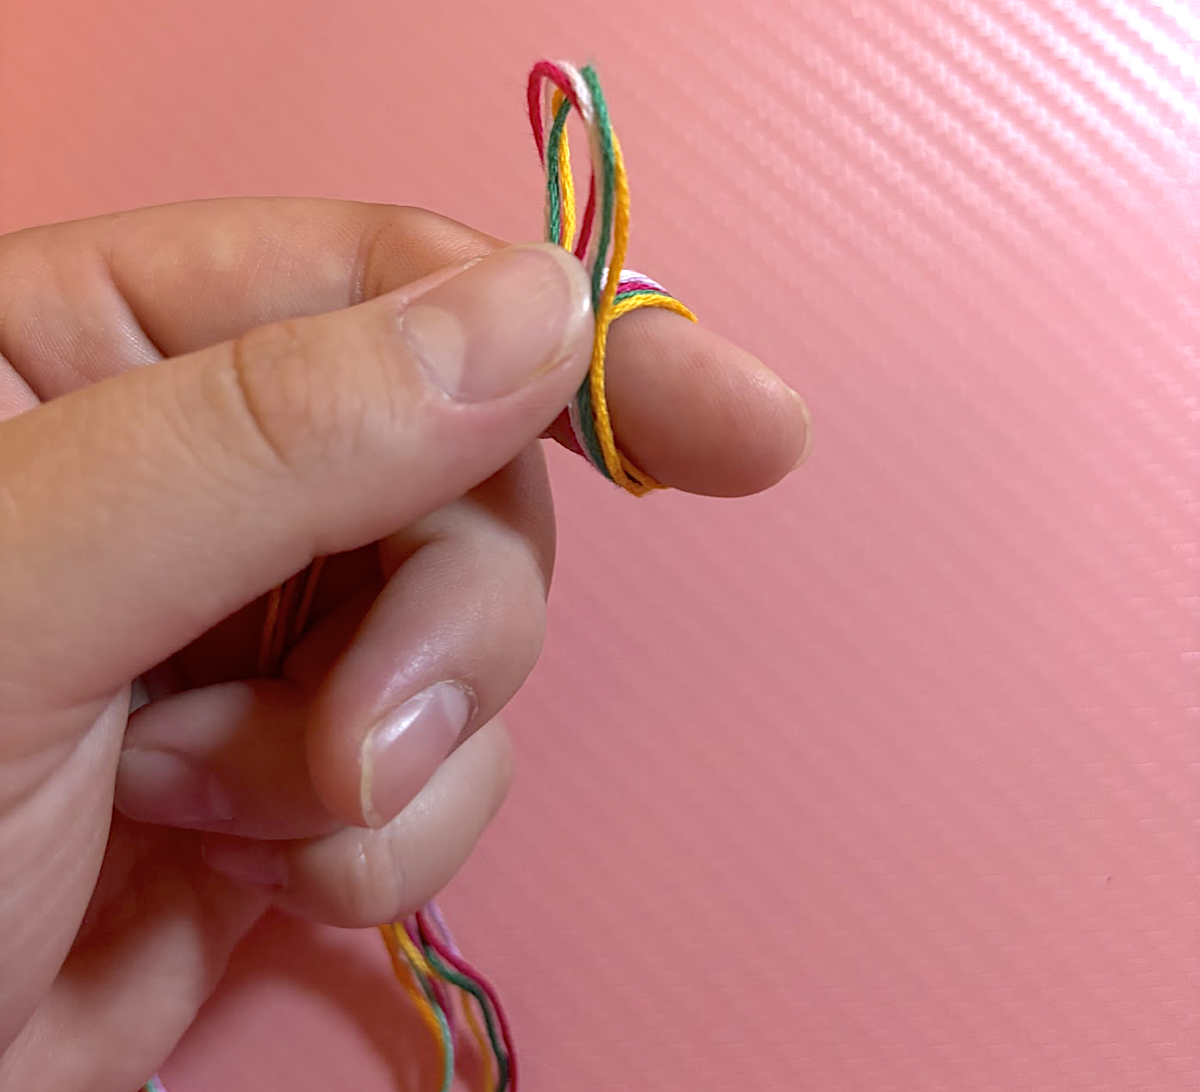
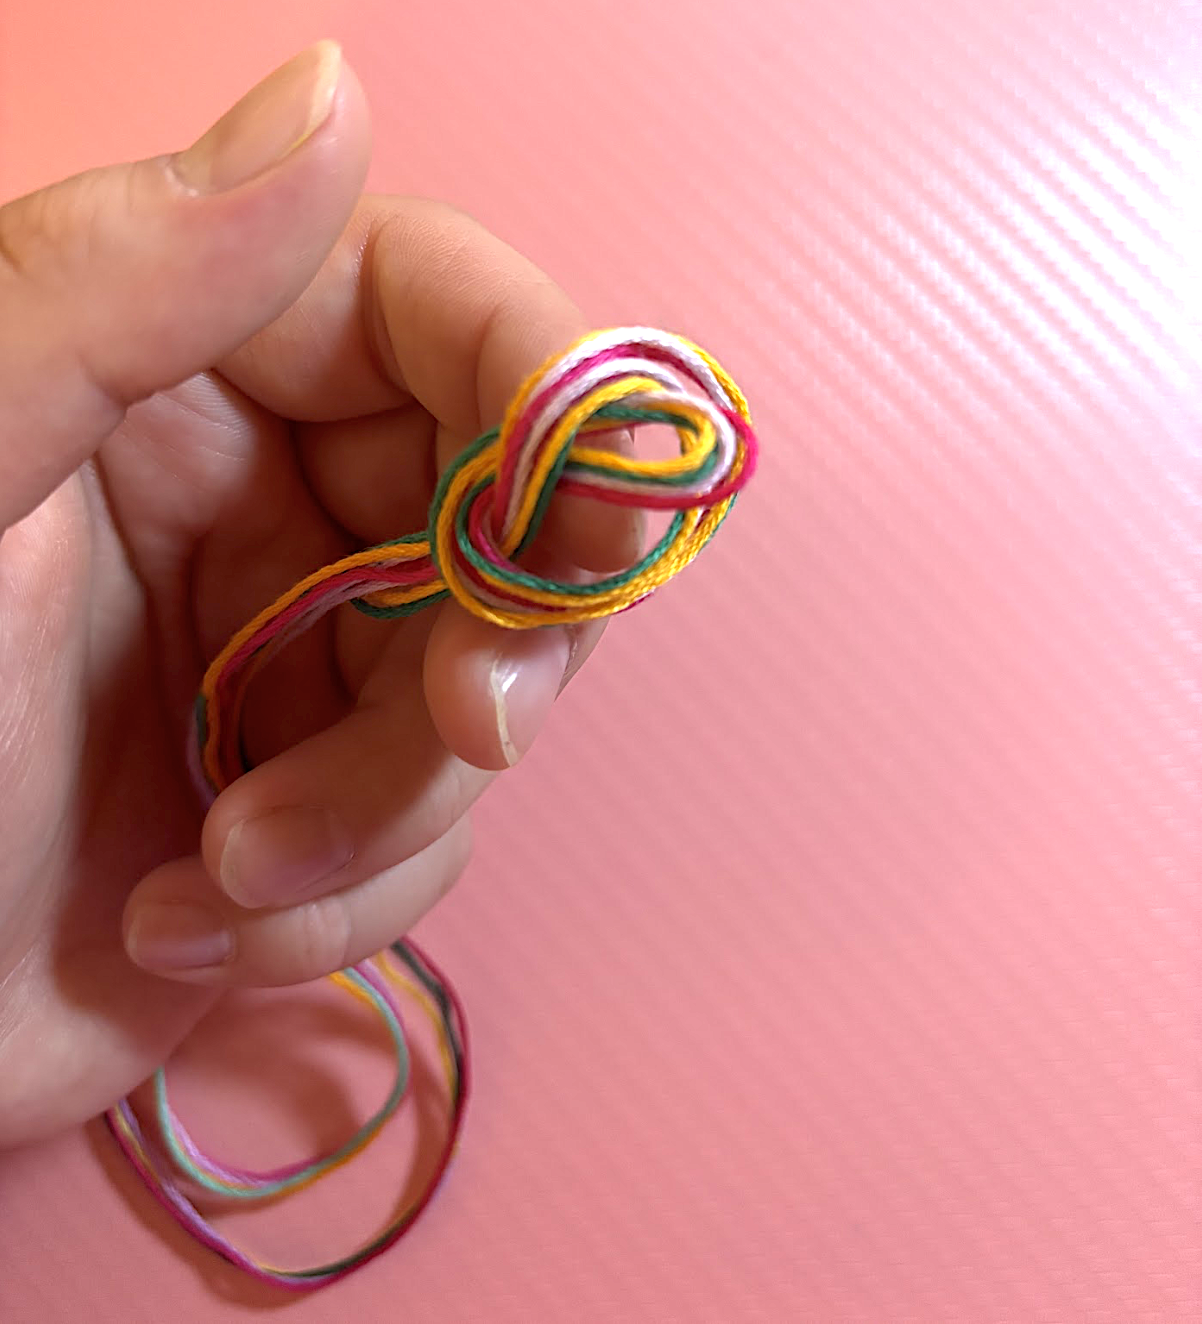
- Fold the floss in half. Use the looped side to tie a simple knot. Wrap the floss around your finger to create an opening and pull the loop through. Make sure the knot is tight.
(Click images to enlarge)

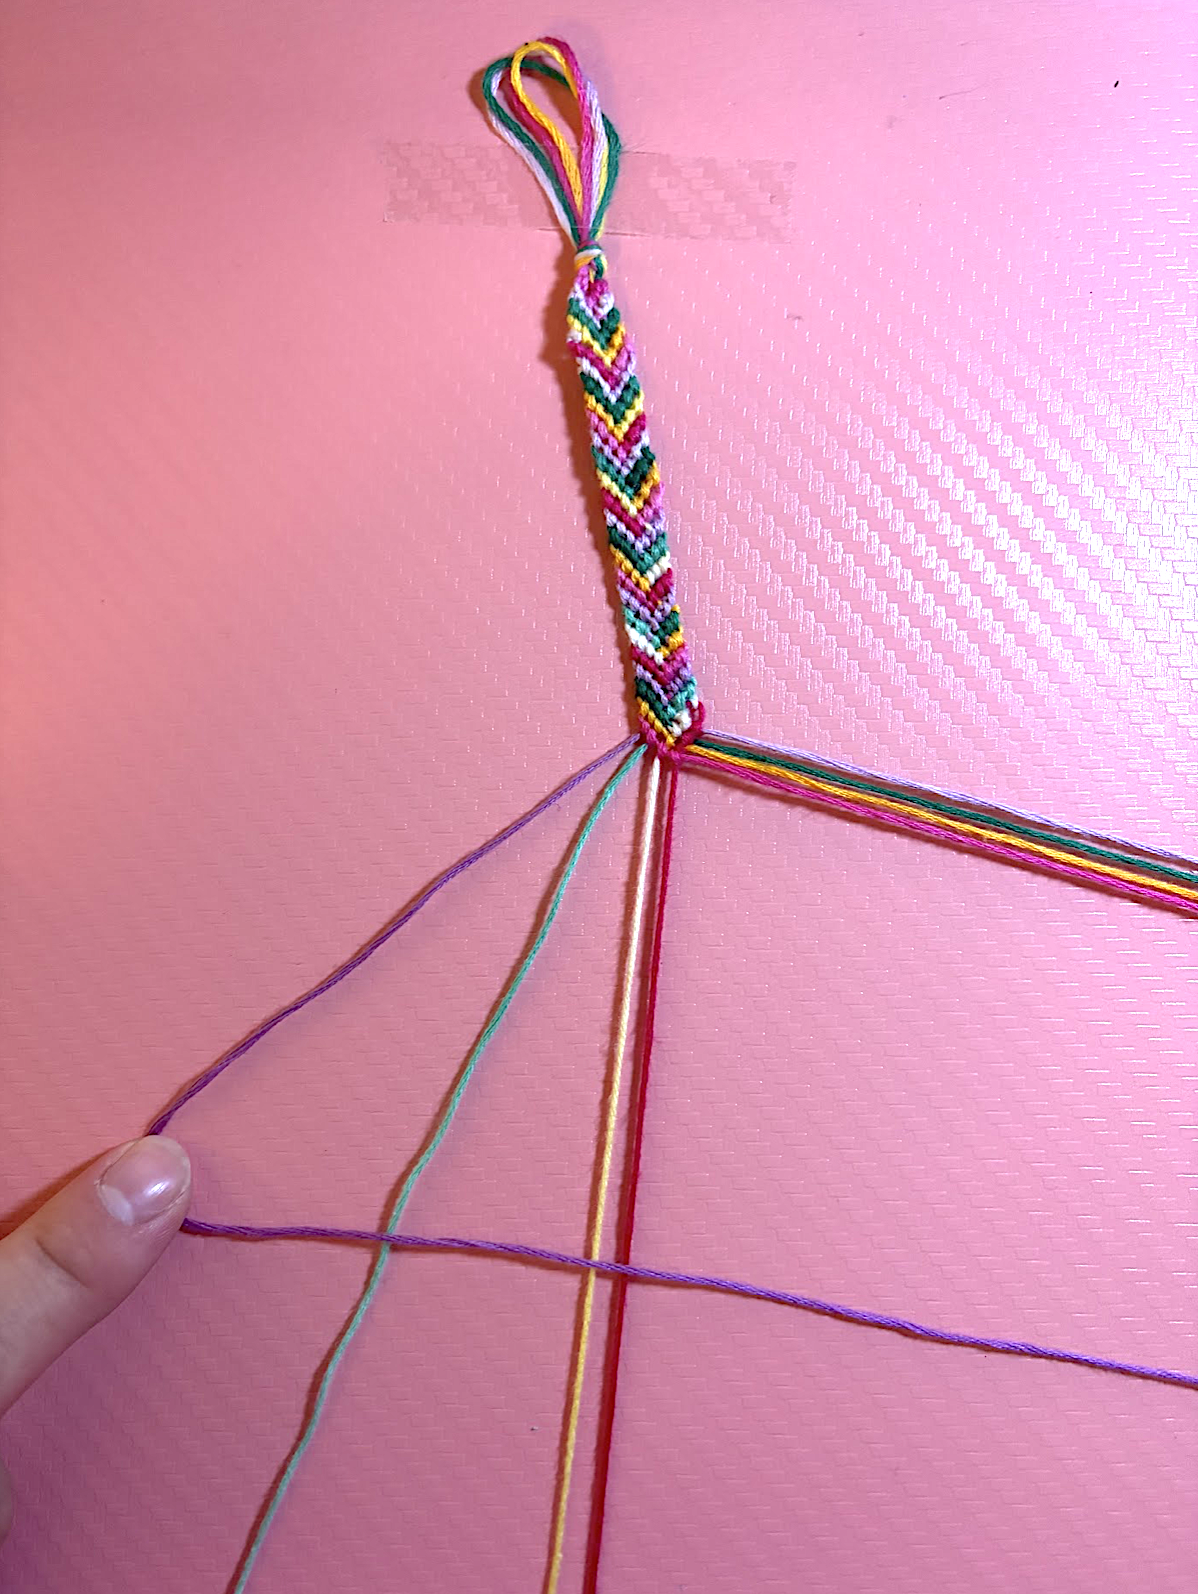
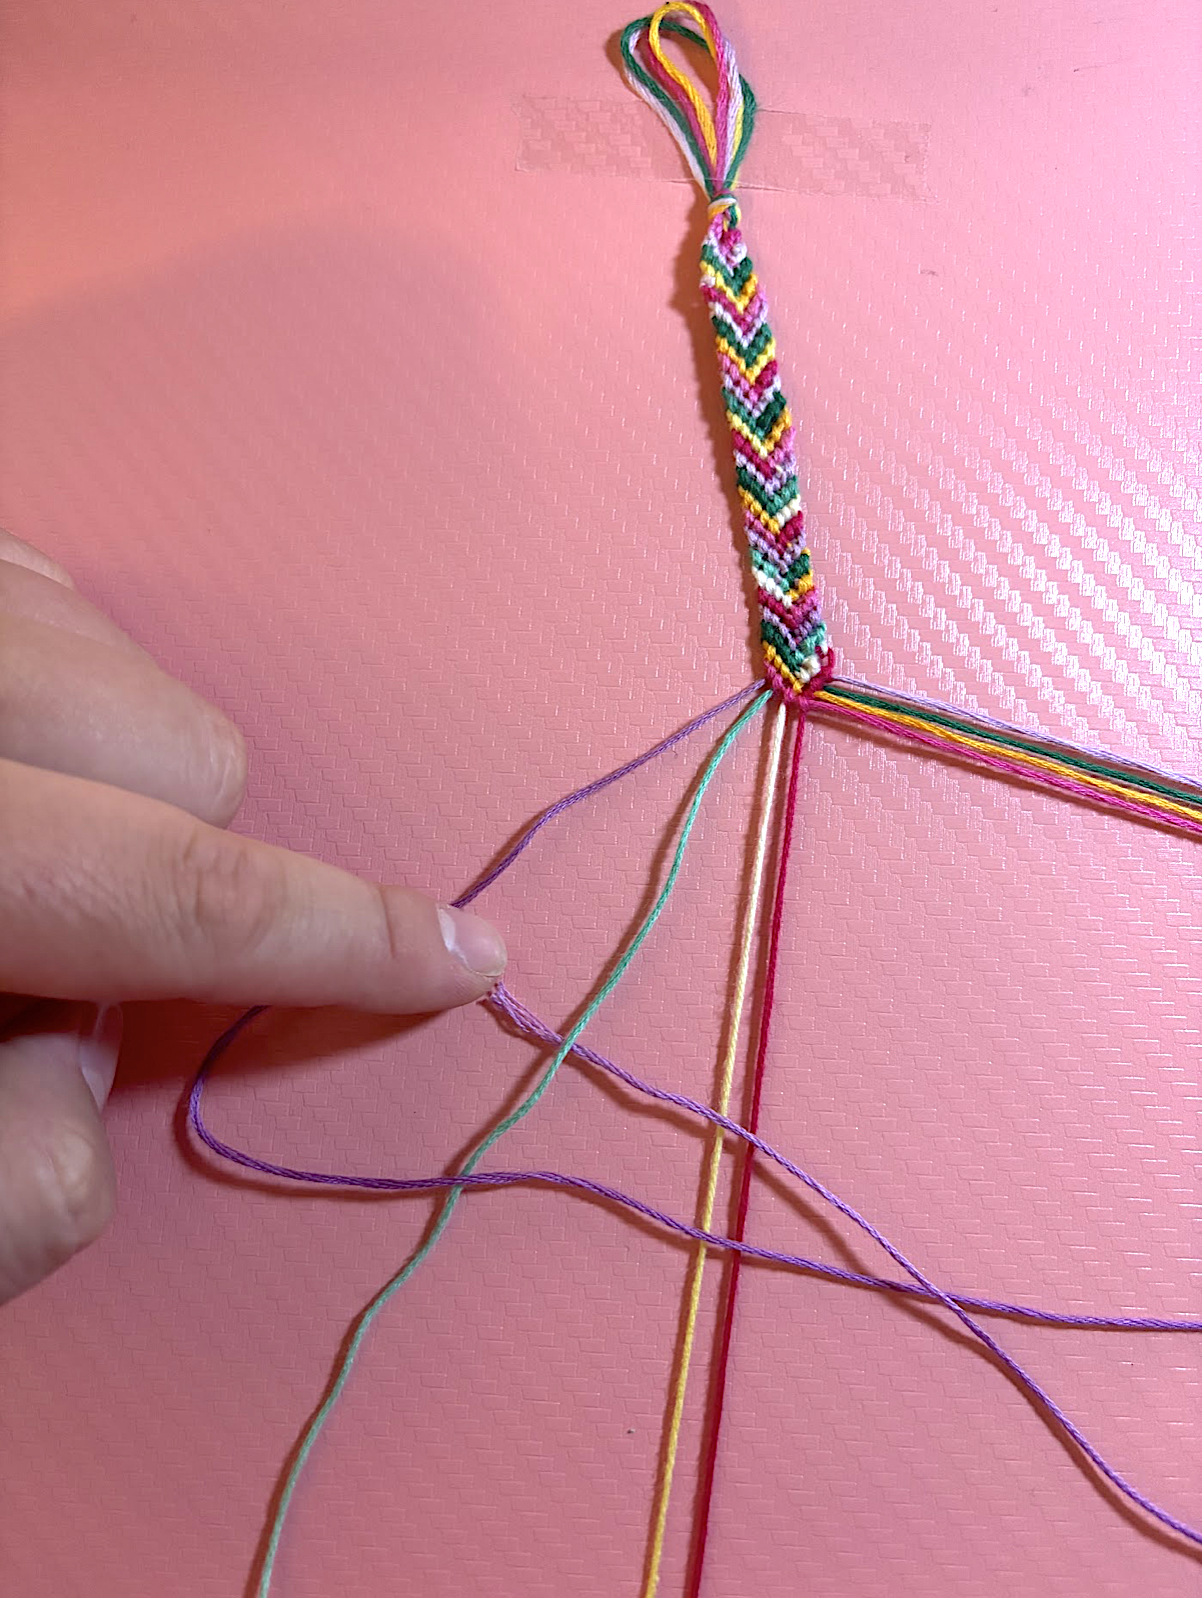
- Tape the loop to your workspace. This will help you as you make the bracelet. As an adult about what is an appropriate work space to put tape on.
- Pull one strand of each color to either side of the bracelet. Separate them in the order you would like for each color to appear in the bracelet.
- Start by focusing on the left side. Push the strings on right to the side for now.
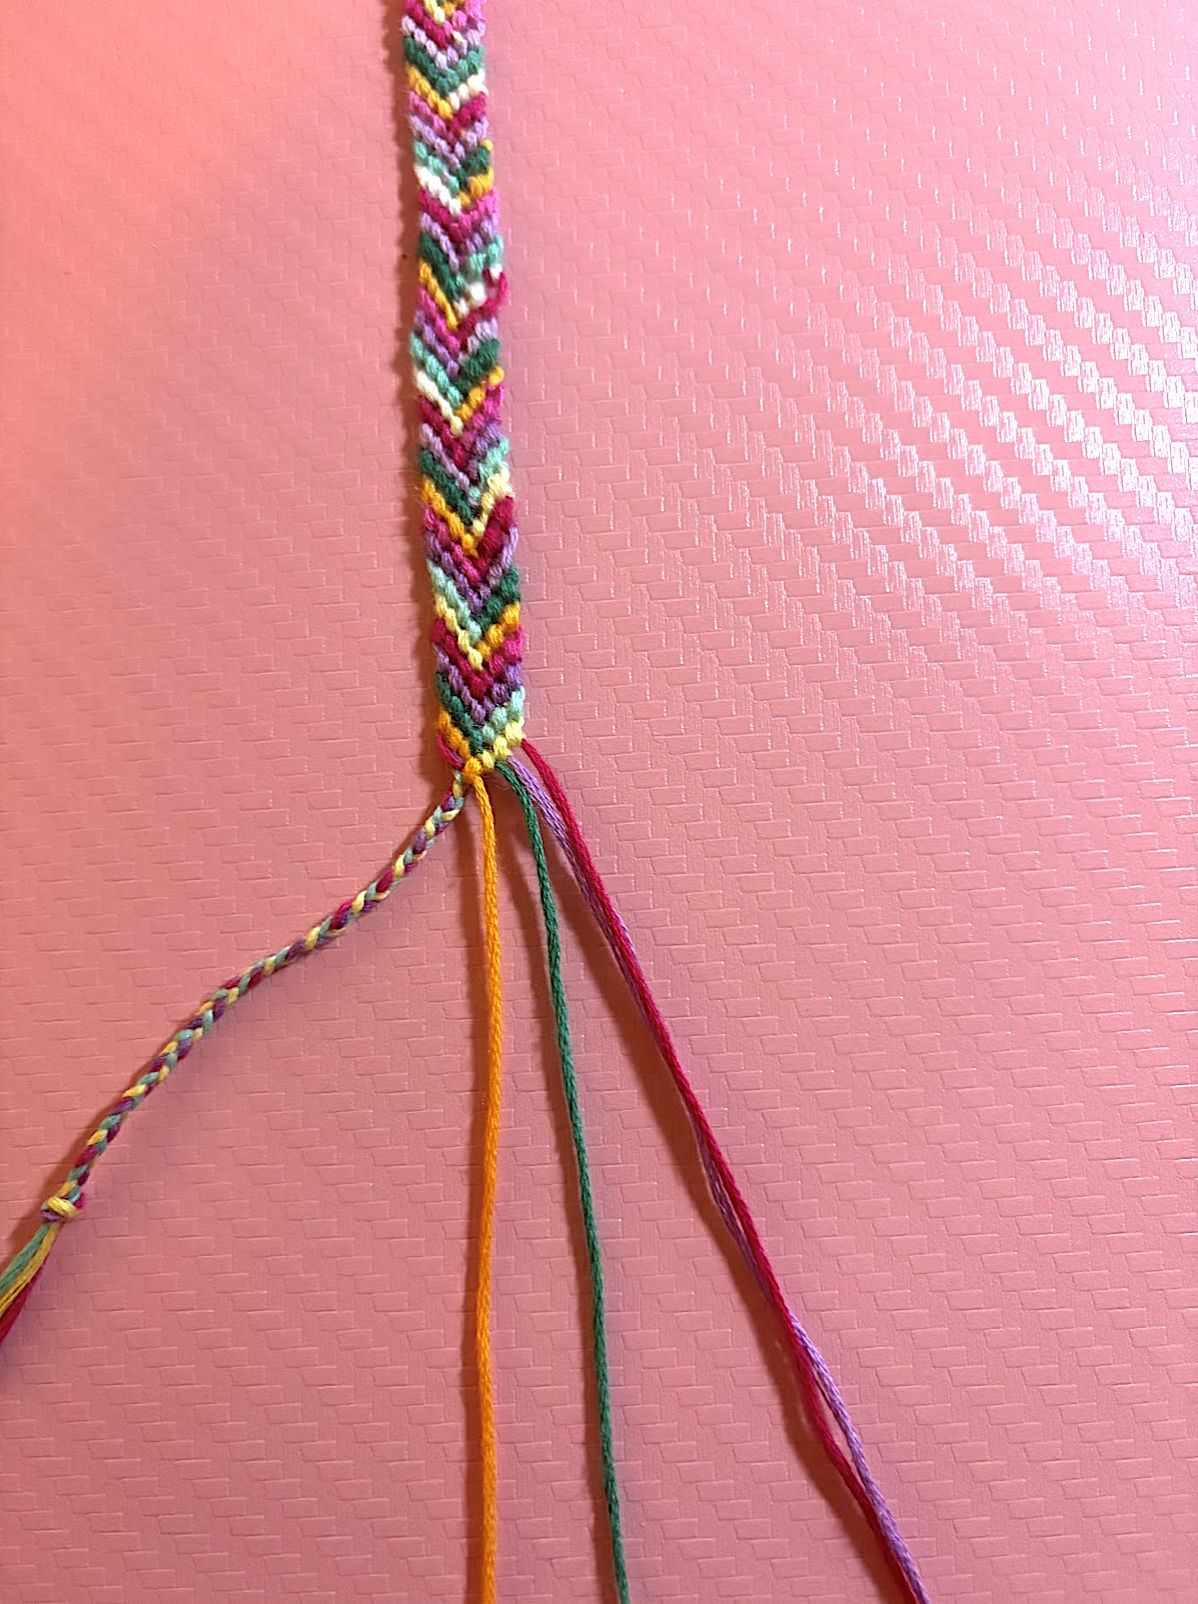
- Use your finger to hold the first string and cross it over the second string. This will make the shape of a 4. Pull the first string under the second string and into the loop. Pull this tight to make your forward knot. Repeat this step once more with the same strings. Doing this twice will make a full forward knot.
- Do this step again using the first and third string. Then with the first and fourth string. Doing these steps will bring the first string to the middle of the bracelet.
- Push the left side of the bracelet over. We are now working with the right side. Make sure your colors are in the correct order.
- We are going to repeat the exact same steps, but mirrored. This will be creating a backwards knot.


- Now that the same colored strings have met in the middle, tie the two together in a forward knot.

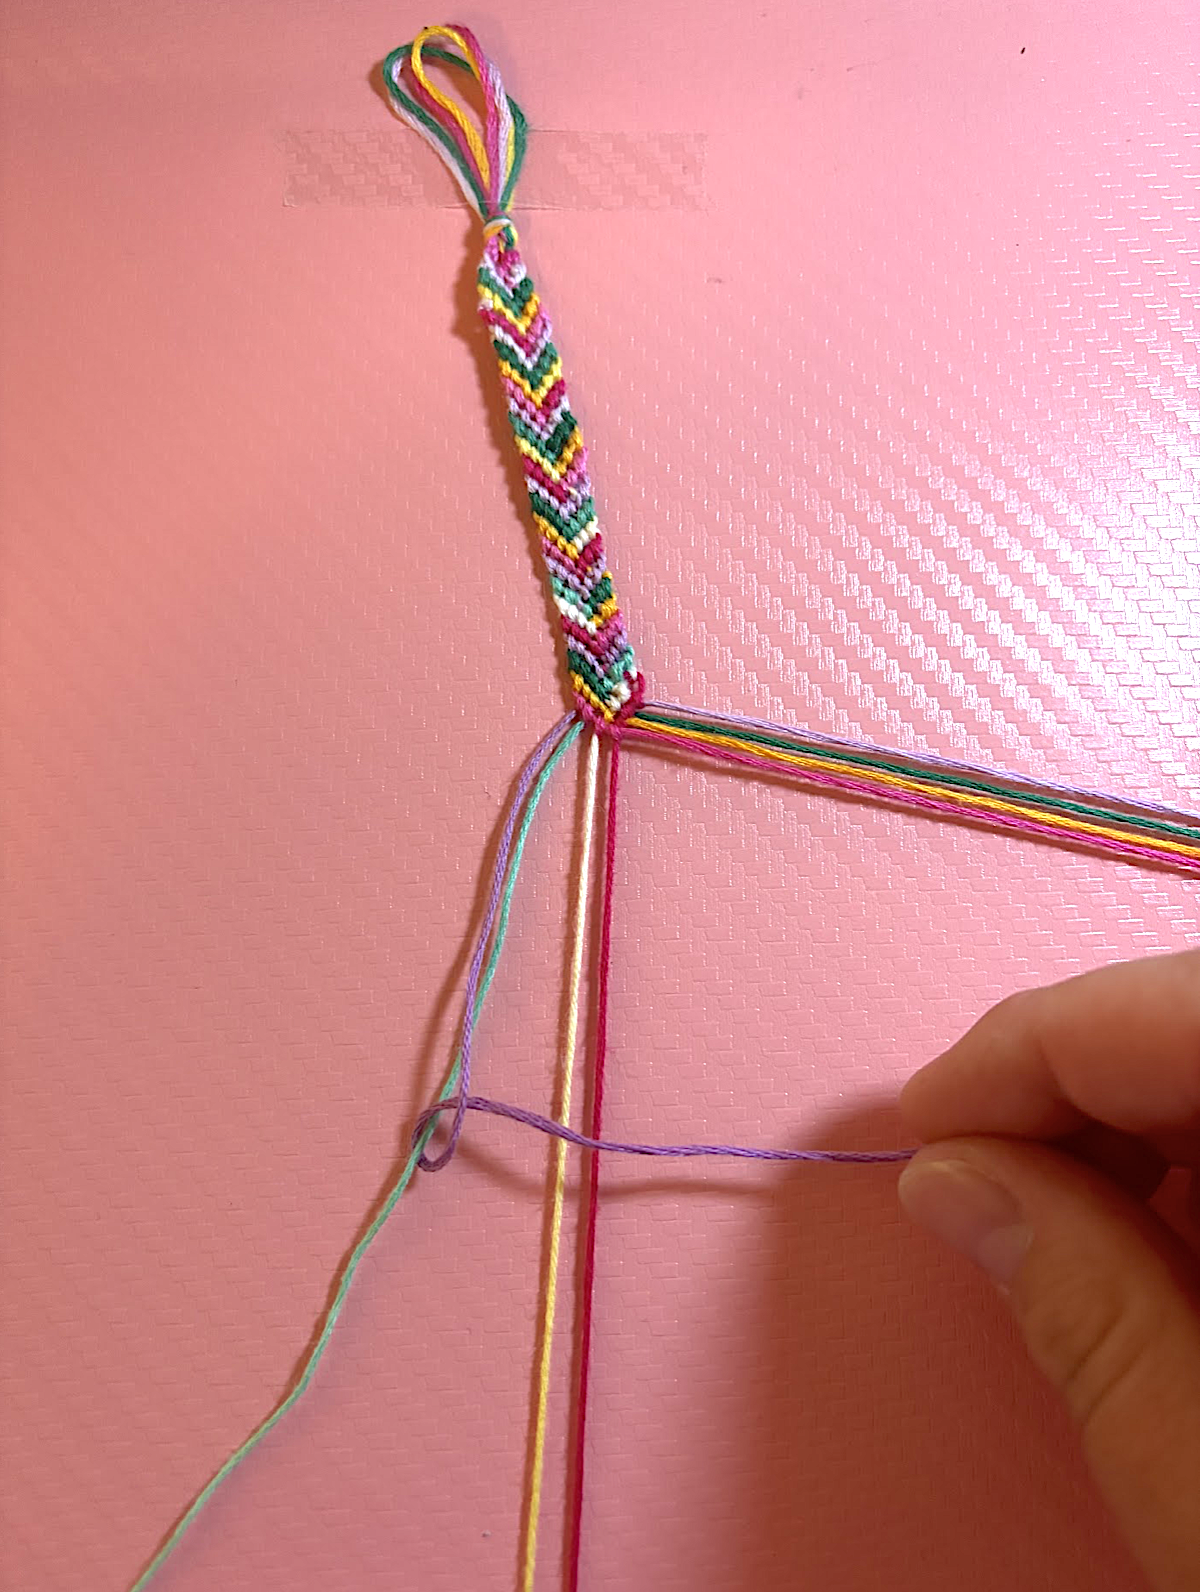
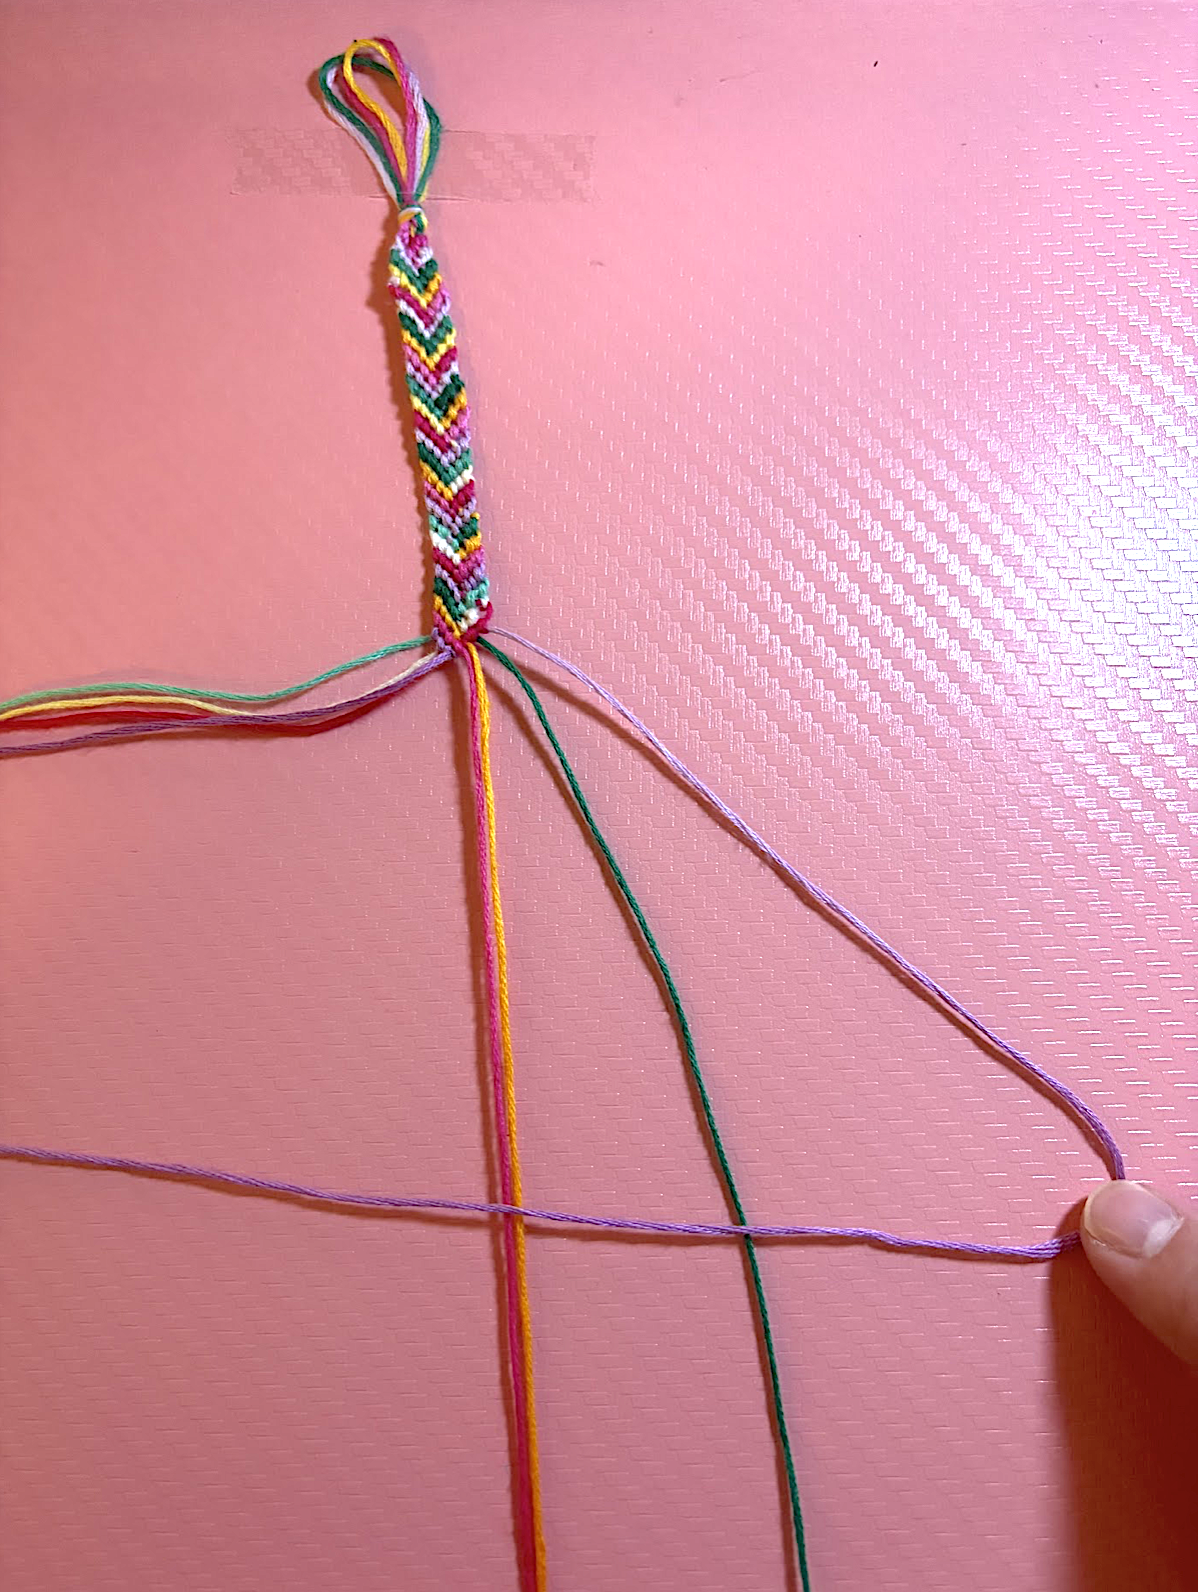
- After finishing the middle knot, switch back to the left side. Start with the original second string, which is now first. Continue to repeat the knot-tying steps over and over until your bracelet is as long as you want. The typical bracelet length is about 7 inches.
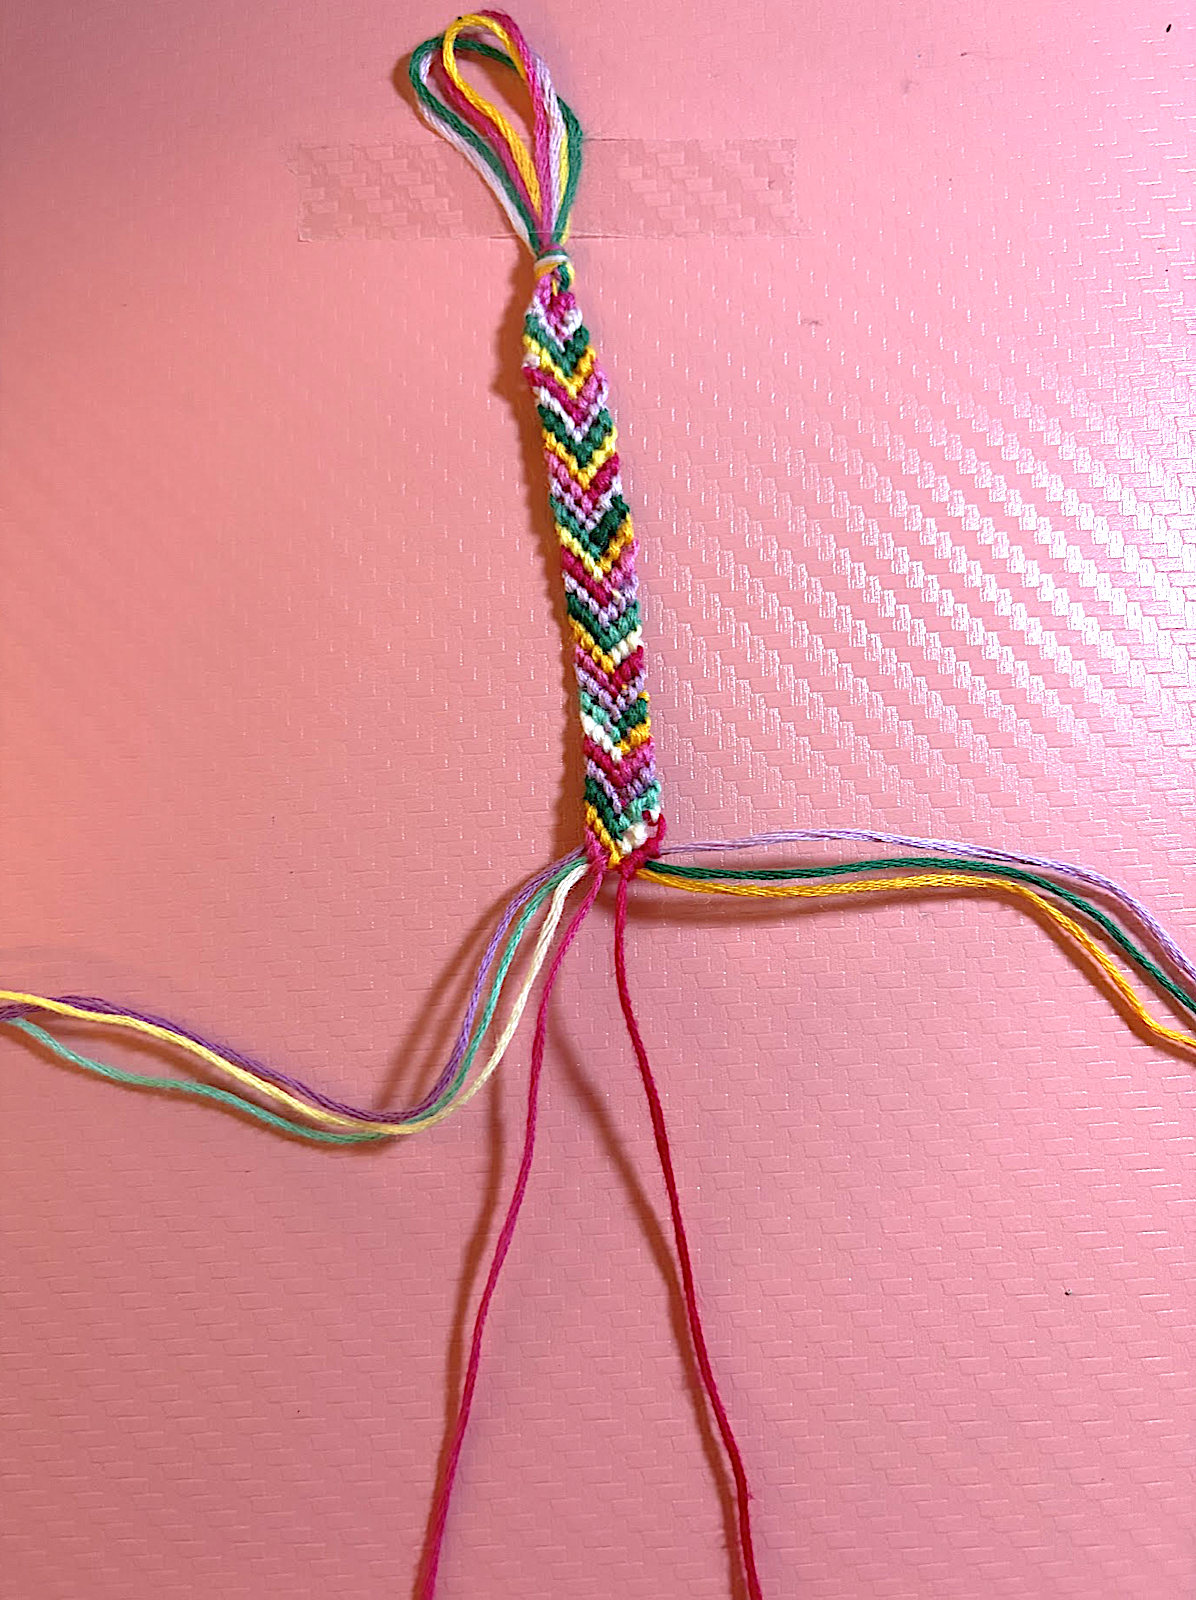
- In order to finish the bracelet, you will be making a simple braid. However, since you have 4 strands on each side, you will keep two of the strands together as you braid. Do this with both the left and right sides of the bracelet.
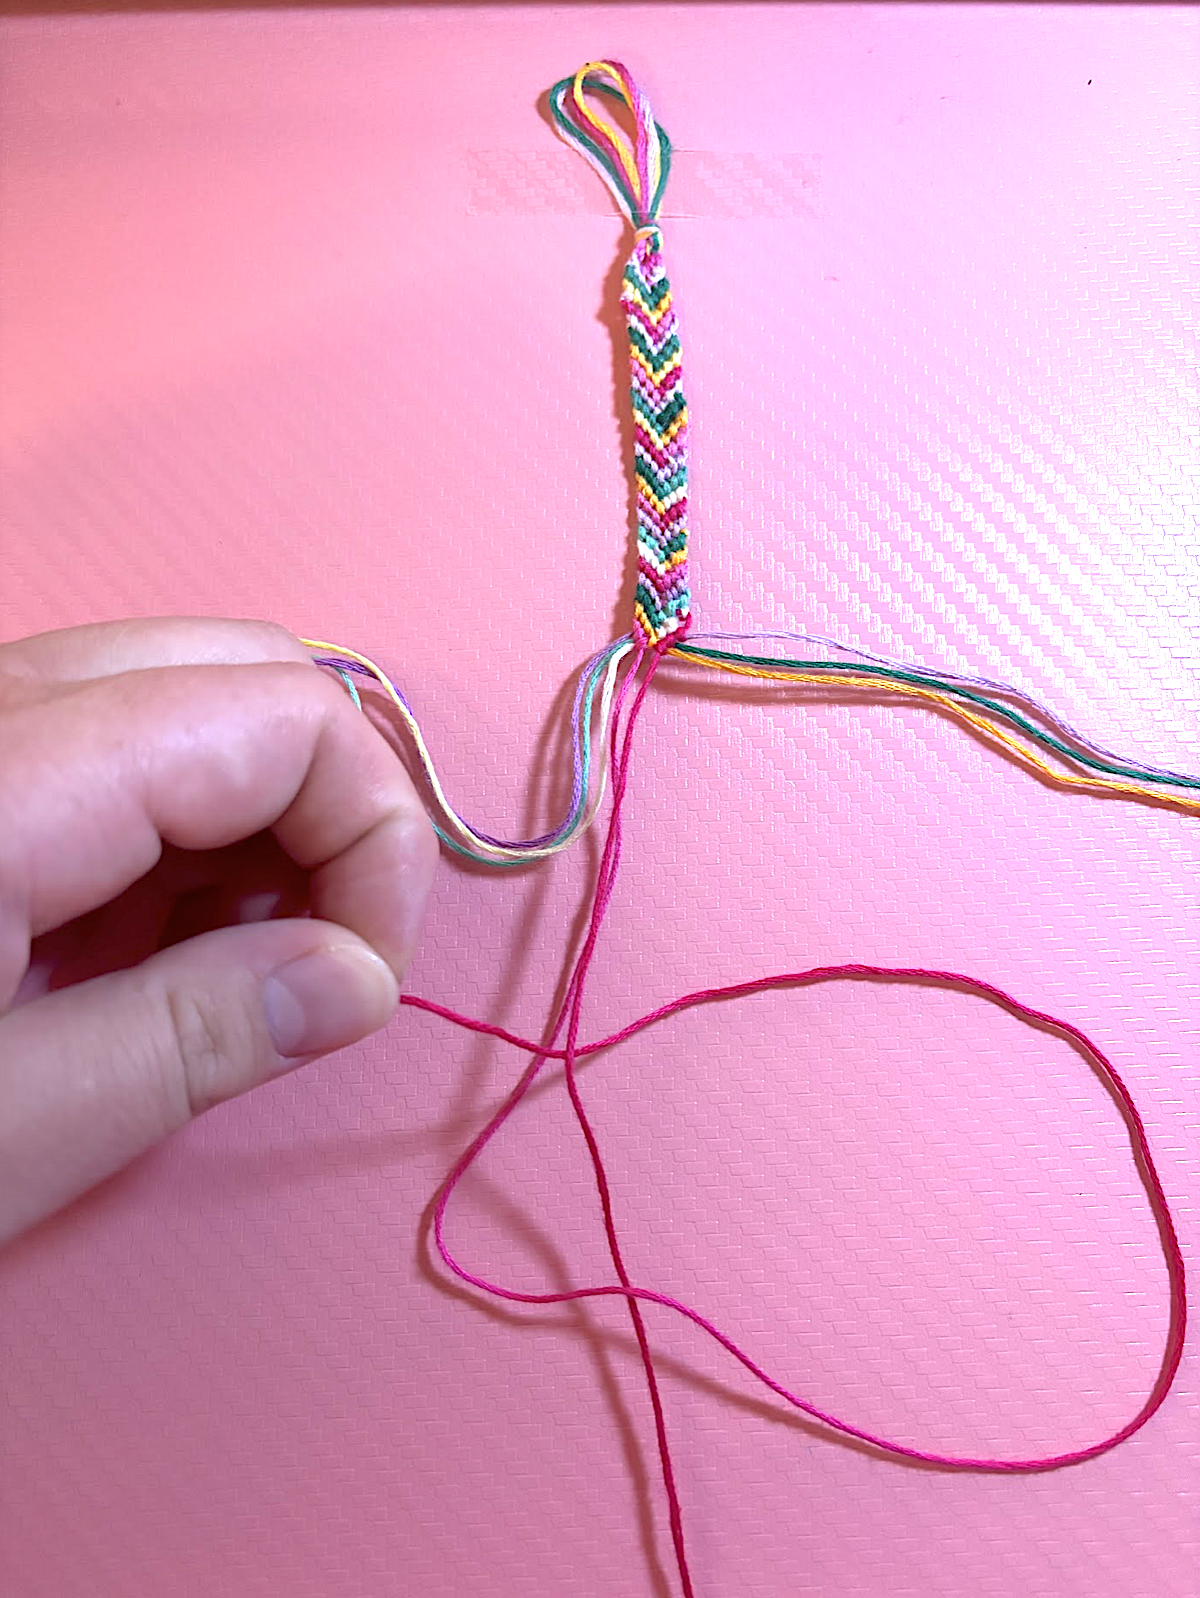
- When finished with both small braids, tie a simple knot on the ends.

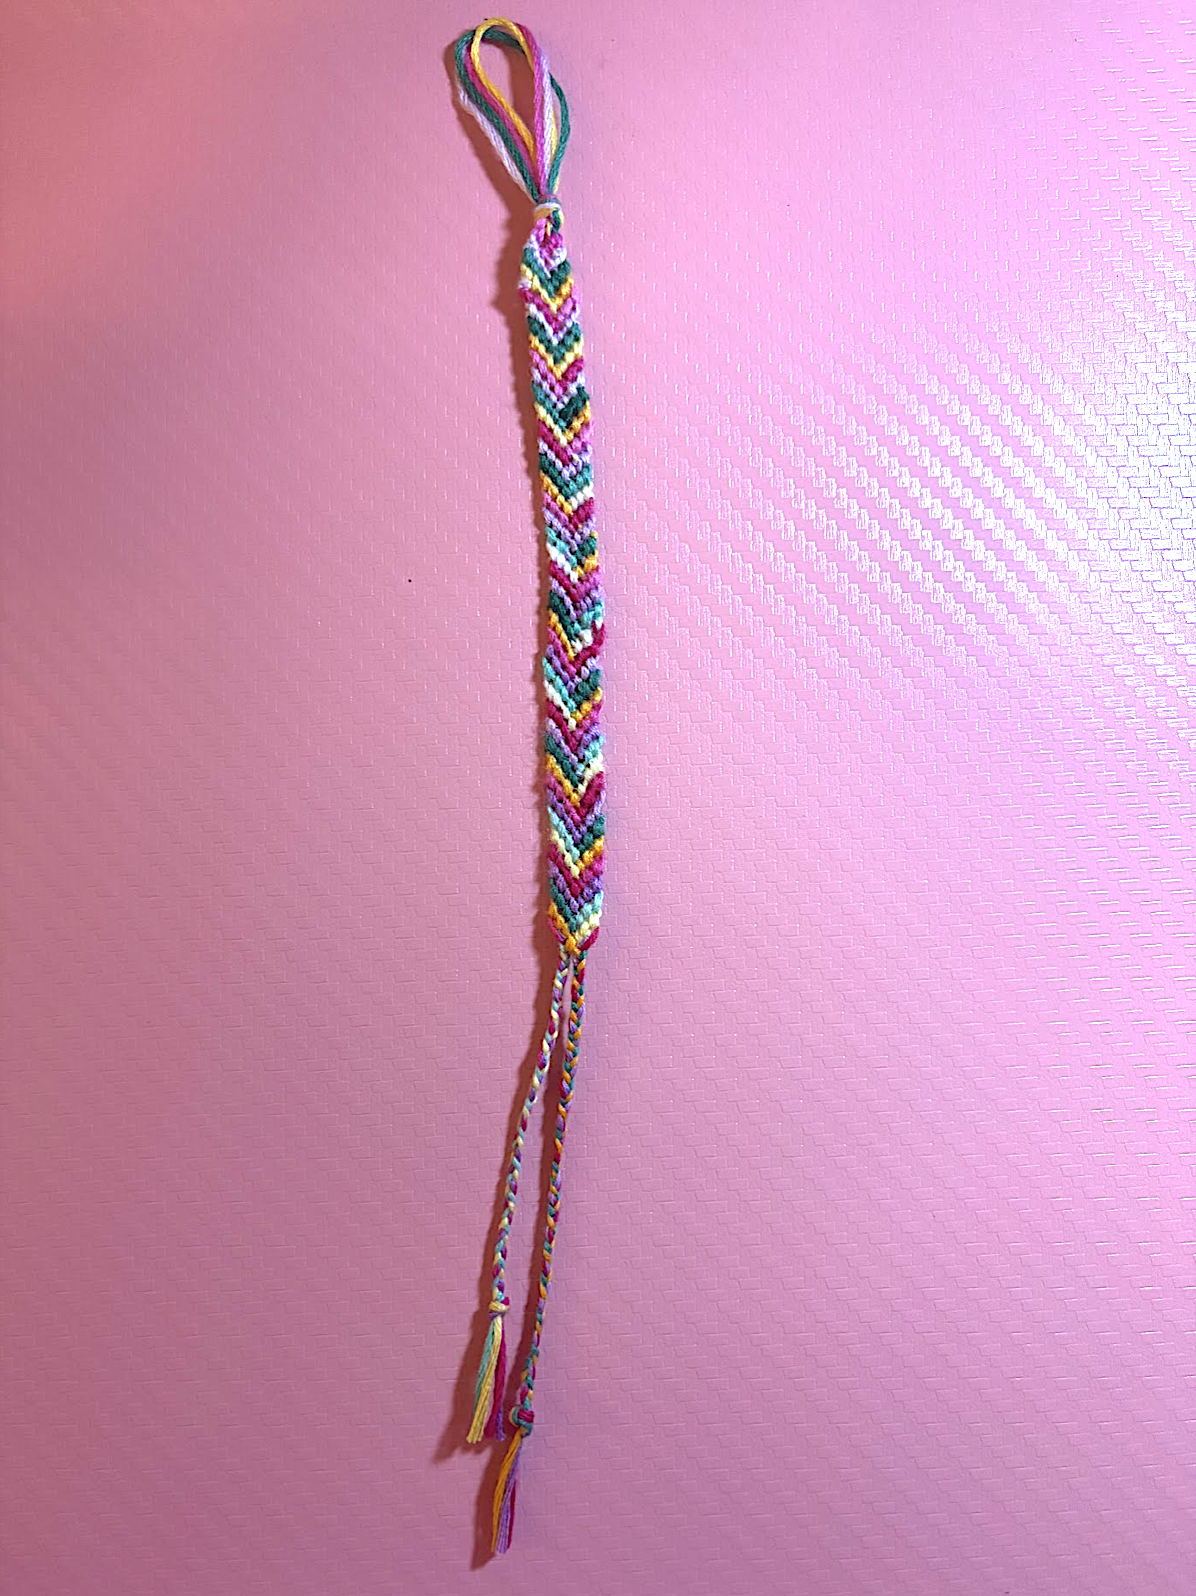
- To put on the bracelet, tie the two braids together through the loop at the top.
Final Step
- Give your bracelet to a fabulous friend!
I hope you find someone to give your friendship bracelet to! Remember, anyone can be a friend! You can give one to a sibling, grandparent, or even your waitress! If you want to keep it to remind you of friends, that’s fine too. See you next week, friends!


